Tuesday, 13 October 2015

Ben and Holly's elf and fairy Party Time #recipes


Last week I told you all about us becoming bloggers for Ben and holly's Little kingdom, This week we have tried out some of the recipe's from Nanny Plums magical cookbook and also added some extras of our own to have our very own magical elf and fairy party.


We made the magic fairy cakes and turned them into mushrooms -

Ingredients: 


  • 100g caster sugar 
  • 100g soft butter 
  • 100g self raising flour 
  • tsp vanilla extract 
  • 2 eggs, beaten 
  • icing sugar and butter edible cake decorations 
  • jam and 12 cake cases


Method;


  1. Preheat the oven to 180oC or gas mark 4. 
  2. Mix the butter and sugar together until soft and fluffy. Now stir in the eggs a little at a time.
  3. Sift the flour, then slowly stir it into the mixture. When it has all been added, divide the mixture between the cake cases.
  4. Bake in the oven for about 20 minutes or until the cakes are golden and firm. Allow them to cool.
  5. cut a small hole in the top of your cakes and fill the space with your favourite jam.
  6. Then cover it up with a piece of cake.
  7. Now decorate your cakes however you like, we decided to turn ours into mushrooms and also made some butterfly cakes with some butter icing as well as some hidden jam.

Ben and Holly's elf and fairy Party Time #recipes


We also made some Gaston the ladybird biscuits, we made our own very simple sweeter version but on the website there is an idea for a savoury ladybird snacks.

Ingredients; 

  • Chocolate Digestive biscuits
  • Butter cream 
  • strawberries 
  • white icing 
  • dark icing pen

Method;

  1. Spread the butter icing on to the biscuit.
  2. Halve and quarter the strawberries and place the quarters onto the biscuit so it looks like the ladybird wings are open.
  3. use a round cutter to make a round piece for the ladybirds head if you don't have a cutter simply just use a knife.
  4. Using the white icing make two round circles on its head for the eyes.
  5. Then using the dark icing pen make the dots for the ladybirds spots and give the eyes two dots in the middle of the white icing to complete Gaston! 
  6. keep refrigerated until ready to serve.

Ben and Holly's elf and fairy Party Time #recipes


  We also made some magical fairy wands and some heart shaped biscuits

 Ingredients; 
  • 100g butter.
  • 60g golden caster sugar.
  • 100g plain flour.
  • 60g fine semolina.
  • sugar to sprinkle.


Method;

  1. Pre-heat the oven 150C/300F/gas mark 2.
  2. Put the butter and sugar into a bowl, mix them together until they make a smooth paste.
  3. Sift the flour into the bowl.
  4. Add the semolina then stir the mixture well
  5. When the mixture wont stir anymore use your hands and knead it, the dough will be ready when there are no bits left on the side of the bowl.
  6. Sprinkle the top with flour so the dough don't stick to the side then roll it out with the rolling pin.
  7. Use you biscuit cutter to cut the dough in to shapes.
  8. Lay shapes onto a baking tray lined with grease proof paper.
  9. Bake the biscuits for 18-20 minutes.
  10. Then remove from the oven and place them on a wire rack to cool.
  11. now is the fun part decorate them anyway you would like you can be as creative as possible the children will love it.
  12. To get the sticks inside the biscuits use a sharp skewer or cocktail stick to make the hole.  


Ben and Holly's elf and fairy Party Time #recipes


We only made the sweeter of the items but there are ideas for savoury snacks as well over on the Ben & Holly website there are also party thank you notes, create your own head dress and lots more all available to download for free! Why not pop over and take a look at the great activities available Here and take a look at Nanny Plums magical cookbook, don't forget you can tweet your ideas using #ElfandFairyparty.


Ben and Holly's elf and fairy Party Time #recipes

Last but not least no don't forget your magic jelly!


SHARE:

Wednesday, 30 September 2015

My Perfect Pastry set from Annabel Karmel #Review


We were asked if we would like to review The My Perfect pastry set I knew the boys would be thrilled to try a Casdon Annabel Karmel My Perfect Pastry Set. Toy company Casdon has created a range of cooking tools for young chefs as inspired and approved by Annabel Karmel. These are perfectly normal kitchen utensils, only suitable for little hands. This set is aimed at children aged 5-11.


My Perfect Pastry set from Annabel Karmel #Review


Annabel Karmel has written special recipes to go with the range (which also includes a Mini Pizza Set and an Ultimate Baker's Set).

Annable Karmel doesn't need any introductions. She is a leading expert on children's nutrition and kitchen gadgets, weaning products, and has inspired a range of baking kits for want to be little chefs.

The set comes with a lovely little book of recipe ideas so if you are short of ideas for what to make, it is all there in the little booklet and they are really simple things perfect for those that like to create and bake.

This set includes:

  • 1 round baking tin
  • 1 mini tart pan
  • 10 cookie cutters
  • 6 measuring spoons
  • 1 silicone spatula
  • 1 measuring jug
  • 1 mixing bowl with anti-slip base
  • 1 silicone handle whisk
  • 10 recipes 

My Perfect Pastry set from Annabel Karmel #Review


This pastry set is fab its eye catching bright and colourful, the majority of the items are made from plastic apart from the tins which are lightweight metal, making them perfect for children to get baking with. The yellow bowl has an anti slip base so it does help to limit the mess to an extent, if that is possible when young children are baking.

We made the lemon cookies from Annabel Karmel's recipe as printed in the leaflet.

You need; 
100g of cubed soft butter, 
50g caster sugar, 
150g plain flour  
zest of 1 lemon. 

however the dough was not the right consistency somehow, it was too crumbly and dry, there was no way I'd be able to roll it out. I added a drop of milk and water to make the dough stick together it did help with the consistency I split the dough in to two separate pieces so each of the boys had there own piece to roll out the rolling pin has a really nice feel to it as you can hold the handles and the body of the rolling pin rotates around great for little hands.

My Perfect Pastry set from Annabel Karmel #Review


The boys loved the cookie cutters and choosing there shapes although Liam being his usual self picked out two that he liked the house and the fish and refused to use any others, but Adam was excited by the choice he had to choose from they loved cutting and putting them on the tray once they had finished making them I popped them in the oven they had to be cooked for 10 minutes at 180'C, I must admit I left them a little bit too long and the edges were a bit overly brown.  Now the idea was that they were going to decorate them with icing once they had done however the boys ad a very much different idea of just eating them all whilst they were warm, so this time they didn't get decorated - but by the enjoyment the boys got from this set I can see it is going to be very loved and used a lot in this house.

My Perfect Pastry set from Annabel Karmel #Review

Overall myself and the boys loved this set, the set does state that it is for children of ages 5 - 11 but Adam who is three got on perfectly well using it as well as Liam did. This amazing pastry set is packed full of bits and I certainly think you get your moneys worth from it RRP £20 from Amazon , my only small gripe is that I think the cookie cutters could do with being slightly bigger, however I can see the makers way of thinking that they are for small hands - we loved this set though!

My Perfect Pastry set from Annabel Karmel #Review


We were sent this fabulous Perfect Pastry set for the purpose of this review all opinions remain honest and my own.


SHARE:

Thursday, 10 September 2015

Egg Muffins Slimming World style #Recipe


One of my new favorite recipes and only takes around 30 minutes to make egg muffins and I promise they are delicious.

slimming world egg muffins


What I made them with...

Ingredients


- 50ml skimmed milk (if you are doing slimming world don't forget to deduct the milk from your allowance)

- 4 Eggs

- 5 rashers of bacon with the fat removed

- 1 Red Pepper

- 4 medium button mushrooms

- Fry light

- Salt and pepper

- Preheated oven 160

Recipe


  1. pour your milk into a measuring jug, then break the eggs into it and whisk thoroughly then set to one side.
  2. chop up the bacon, mushrooms and peppers into small pieces
  3. spray a frying pan with fry light, and lightly fry the peppers, mushrooms, and bacon
  4. using a spoon distrabute the mixture evenly between six cake cases or the tin I used silicon cases.
  5. pour the egg and milk mixture over each of the cases so that there is around the same amount in each, add salt and pepper if you wish. 
  6. cook for around 20 minutes or until the top is browned 

slimming world egg muffins


This recipe is so easily adapted you could add different vegetables onions or more meat, gammon or sausage meat been as daring as you like and the recipe is really quick and easy these are great to add to a dinner or just for snacks throughout the day.


SHARE:

Wednesday, 22 July 2015

A quick and easy Slimming World #Recipe


slimming world savory mince winter warmers


  • 1 X onion diced
  • 200g mushrooms diced
  • 500g extra lean minced beef
  • 2 X teaspoons chopped garlic
  • 1 X teaspoon mixed herbs
  • a small bag of frozen mixed vegetables
  • 3 x beef stock cubes
  • Frylight

  1. Put the frozen vegetables in a a pan and boil them until soft and they are cooked.
  2. Whilst the vegetables are boiling spray a large pan with fry light and placed on a medium to high heat
  3. fry the mushrooms and onion for around five minutes
  4. Add the mince, chopped garlic and mixed herbs fry until the mince is browned
  5. Add the beef stock
  6. Drain the water away from the frozen vegetables and add to the beef mixture leave to simmer for around 20 minutes so the flavours infuse, stirring occasionally
  7. Serve with steamed broccoli or Brussels  


The meal is syn free and it makes quite a lot I usually freeze some down for later in the week its yummy not only that you can adapt the recipe to suit yourself why not try adding in some different vegetables or serving it with butternut squash instead of chips or the above vegetables!


slimming world savory mince winter warmers


SHARE:

Thursday, 25 June 2015

Slimming world my favourite food staple


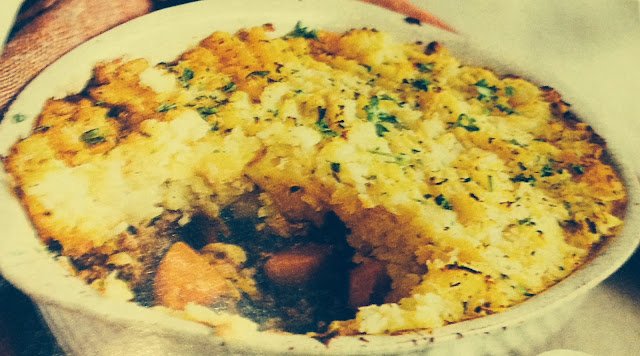
slimming world cottage pie


This week I maintained my weight loss journey, I'm glad I did I was expecting a gain, I don't know if you feel the same, but this week has been an emotional one, what is the one thing you do when you are emotional whether it be happy or sad I always find myself turning to food, but not vegetables or fruit I don't want healthy I want takeaways especially dominoes pizza its actually my favourite, of course not forgetting my love for chocolate, so I basically sabotaged my own journey, this week one of the meals I have cooked is cottage pie from Slimming worlds Food glorious food book, this is one of my favourite meals and the boys enjoy it too not only that there is enough left over to save some for the rest of the week either freezing or placing it in the fridge for the next day - so here is the recipe.

slimming world cottage pie


Free On Extra easy -
It is easy to make, just make sure you prepare everything before you start to make it.

  • 1kg potatoes, peeled and chopped 
  • salt and freshly ground pepper
  • low calorie cooking spray
  • 1 red onion finely chopped 
  • 2 garlic cloves crushed
  • two celery stick's finely chopped
  • two carrots peeled and chopped finely 
  • 500g 5% fat lean minced beef 
  • 400g can chopped tomatoes
  • 1 tbsp vegetable stock
  • 1 tsp sweetener
  • 2 tsp dried oregano 
Cook the potatoes in a pan of lightly salted boiling water for 12-15 minutes - or until tender mash until smooth season well and set aside.
meanwhile spray a large frying pan with the low calorie cooking spray on a high heat add the onion, garlic, celery and carrots and stir fry for five minutes then add the mince and stir fry for a further five minutes until brown.
Then add the tomatoes, stock, sweetener, and oregano bring to the boil and and then turn the heat down low let it simmer for 12-15 minutes.
Pre-heat the oven to 200C/ Fan 180C/Gas 6.
Transfer the beef mixture to a large casserole dish and spread the mashed potatoes on the top, smoothing the surface with the fork bake for 25-30 minutes or until golden brown and bubbling - don't forget to fill up the other half of your plate with super free vegetables!

slimming world cottage pie
  
SHARE:

Tuesday, 17 June 2014

Our Little Secret - Tikka Masala Dine in Kit #Review


As you all know around a month ago I started my new job, well by the time I get in from work I am usually tired and hungry and to be quite honest I really don't want to be spending hours in the kitchen cooking, I want to eat something that is ready fast - yes I know what your thinking we could all do with a live in chef! but from a practical point on view, I want to be able to make something that is going to be ready in less than half an hour.


chicken tika easy to cook family meal


Our little secret is a new range of meal kits, cooking sauces and micro-meals that are family friendly and offer easy to prepare meals with Indian, Oriental and Mediterranean Flavours. I tried the Tikka Masala Dine-in Meal Kit

On the box its ready in less than twelve minutes - " breaths a sigh of relief" so its quick and easy let me tell you about it and what I thought of the taste of the kit. The meal kit includes dry spices, paste, sauce and rice, all vacuum packed so that all you need to add is the meat or vegtables of your choice.

The whole range has a handy chilli rating on the front of the pack so that you can choose a recipe to suit your palate - this one has two out of three chillies and was already pretty hot so be prepared to add some extra cream to cool things down if necessary. and there is an easy guide on the front of each pack so you can see quickly and easily the nutritional content of each pack.

Our Little Secret have really easy to understand guidelines on the back of each pack so you can follow each step - you really don't need to be a chef to be able to put this fabulous dish together its simple!

The packaging promises an effortless meal and that is exactly what you get as everything apart from the meat is in the box. You just chop up the meat of your choice - I went for chicken but you could also use lamb, fish, prawns, pork or your favourite vegetables - leave to saute for 2-3 minutes then add the paste and the rest of the sauce cover and simmer for 5-6 minutes or until the sauce has thickens up.

The rice which is in the box as well is done separately taking just two minutes in the microwave - and there you have it a fantastic higher end gourmet dinner in less than fifteen minutes, fantastic don't you think!  
  

chicken tika easy to cook family meal


The meal took around fifteen minutes to prepare and it was really delicious. I was very impressed at the quick and easiness of the meal even though I thought at a glance of the packet I thought it would be more difficult. The tikka masala tasted delicious, I didn't actually add anything extra to this kit and I was a little worried it might be on the hot side but to be honest I thought it was actually quite mild and I really enjoyed tucking into it when I had finished work. The kits cost £3.49 and the sauces are priced £1.49 which I think is a great price.

Our Little Secret is currently available nationwide in Morrisons and Makro.


I was sent this product for the purpose of this review all opinions remain honest and my own.


SHARE:

Saturday, 10 May 2014

Our fantastic bank holiday food from Morrisons #Recipe #MorisonsMum


Last week I received an e-mail BritMums were looking for mummy bloggers to write about the savings you can make at Morrisons, as they have now cut a lot of the food prices - I of course replied never thinking for one moment that I would get chosen for this opportunity - the Tuesday after I had applied an envelope dropped through my letterbox containing £80 Morrisons vouchers and a letter saying I had been chosen to be a #MorrisonsMum for the weekend! I actually couldn't believe it I was ecstatic to say the least.

I enlisted the help of my dad and Adam, Liam was at school and we set off to Morrisons with bargains in mind, I couldn't wait to see how much the food was and what was on the shelves you see I don't often shop at Morrisons as previously I have always found it to be more expensive and it is a little bit out of the way. I didn't realise until last week that they offer an online shopping service, I am told they have been offering this service for ages - no one told me!

When we reached Morrisons the first thing we were greeted with was a huge sign saying look for our new everyday cheaper prices with an arrow saying im cheaper - I found myself smiling and nodding to the sign .

recipe spaghetti Carbonara and shopping with Morrison


As we walked around the Morrisons store, their were practically stickers on most thing and if you don't notice the stickers on the food there are big yellow stickers on the floors pointing out the prices of the food that has been made cheaper, I have to say it did help to make shopping just that little bit easier being able to see the prices, so you can make better choices for a cheaper shop!

recipe spaghetti Carbonara and shopping with Morrison


we were given £80 to spend at Morrisons and I spent 104.78 so slightly out of budget, but I wasn't keeping track of the prices as I wondered up and down each aisle. Every time I spotted something that was cheaper and I knew it was a bargain it went into the trolley, However I did manage a monster shop 74 items later and I was finished! some of my best buys were;

  • Carrots 69p
  • tinned tomatoes 31p
  • frozen Yorkshire puds 49p
  • Nuggets 90p
  • 1.5 litres squash £1.25
They're just a few of the bargains, but there really were so many to choose from, For our bank holiday meal I decided to make a Healthy Meaty Spaghetti Carbonara surprise because the boys love pasta and it is one of my favourite meals.

Ingredients;


  • 4 Garlic cloves chopped up,  60p two pack whole garlic - 30p each
  • 100g Parmasan Cheese 1.50
  • Three Chicken breasts chopped into chunks £3.25 per pack (£7.50 for 2)
  • 100g Back bacon 2 packs for 3.50 - 1.75 each
  • 3 large eggs  1.69 box six 28p each
  • 100g closed cap mushrooms chopped 69p
  • Fry Light or oil 
  • Spaghetti 23p 500g

Method


Cook the spaghetti according to the packet, meanwhile place a large frying pan sprayed with fry light over a medium heat, Add the chicken and fry until it lightly browned then add the bacon and mushrooms and stir fry for 2-3 minutes or until lightly browned, Add the garlic and stir fry for 30 seconds, then set aside.


recipe spaghetti Carbonara and shopping with Morrison


Drain the spaghetti and add the bacon mixture to the pan. Add half the Parmesan, and toss the heat from the spaghetti will partly cook the egg but still leave it moist

divide the Carbonara between four, add fresh parsley to the top to decorate if you wish, this meal is real easy it literally takes around 15 minutes to make and is very good if your on a budget! 

The meal actually in total costs a fantastic £6.86p so that is £1.71p per person and to be honest the portions could really stretch to another two people, a fantastic price wouldn't you agree!  

recipe spaghetti Carbonara and shopping with Morrison


I would go back to Morrisons in the future, some of the prices are great others I would say average the other supermarket prices so I would say Morrisons are not more expensive there prices have certainly dropped and are looking like they're going to be staying that way which is great news for us mums! 

We really enjoyed our bank holiday shop so thank you to Britmums and Morrisons why not go down to your local store and see what you can save money on I would definitely recommend it and I would love to hear about your savings!


 I was sent £80 in Morrisons vouchers for the purpose of this post - in association with BritMums


SHARE:

Thursday, 24 April 2014

Delicious Easter Chocolate nests


last week we have been busy baking up some great Easter nest cakes. Of course the boys wanted to be involved especially Adam who loves to eat he was so excited, so with the inspiration and tips of Center Parcs, We got to work making some delicious Easter delights. The top tip I loved the most from Center Parcs was this.

  • "Mix some cereal, such as bran or broken up wheat, together with some melted chocolate and form the mixture in to nest-like shapes, leaving to cool for a finished nest".

Liam and Adams favourite thing, like most children is chocolate so this was a fitting treat and great idea for them to get stuck in and make some fabulous chocolate cereal nests in the simplest way possible for a two and a four year old.

First I put the shredded wheat into a sandwich bag and got them to crush them all up they loved doing this bit!  

home made easy Easter nests recipe for kids and children


next we tipped all the crushed up shredded Wheat into a big mixing bowl ready to be covered in melted chocolate.


home made easy Easter nests recipe for kids and children


Once we had poured the two bags of crushed up shredded wheat into a big mixing bowl, I got the boys to help me to break up the chocolate and I popped it into the microwave for 30 seconds at a time stirring intermittently until all the chocolate had melted, whilst the boys waited patiently.

The chocolate was all melted but really hot so I poured it onto the mixture and stirred it up - I didn't realise it was so tough to stir once the chocolate has been poured in.

In the meantime I got Liam and Adam to put the cake cases into the cake tray ready for the mixture.


home made easy Easter nests recipe for kids and children
  
Next was the fun and messy part filling each individual case with the cereal mixture, the boys loved this bit I am sure there would have been more Easter Nests but it was one spoon for the case and one for their mouths they loved it though!


home made easy Easter nests recipe for kids and children

Last but not least we added the chocolate mini eggs as the final touches. I even made some more myself later in the week because Liam and Adam loved them so much I must admit the chocolate Easter nests were delicious, simple and great fun to make!


home made easy Easter nests recipe for kids and children


Did you make anything over Easter? I would know what baking delights you have been doing with your children.


‘This is my entry to the Center Parcs and Tots 100 April challenge. If I’m chosen, I would like to visit Sherwood forest.


SHARE:

Tuesday, 15 April 2014

Green Earth pan - By Ozeri #Review


Don't you hate it when you cook food and it sticks to the pan, it is one of my pet hates in life, from eggs to pancakes or cooking sauces and meats its just really annoying it makes the food look messy - and lets face it when your food looks messy you don't want to eat it!

I was sent a Green earth pan to review from Ozeri,


long lasting Green earth non-stick frying pan


The Green Earth Pan, features Greblon and is made in Germany - This is the description from the box;

  • No harmful heavy metals or chemicals.
  • superior non-stick performance.
  • Durable, scratch resistant Ceramic as found in nature.
  • Comfortable silicon coated handle.
  • Completely eco-friendly (ceramic coating emits no harmful fumes).
  • easy to clean.
  • Induction stove safe.

The Size of the green earth pan is 20cm - so its quite small and compact in its size so cooking is limited to eggs pancakes and bacon.


long lasting Green earth non-stick frying pan


The pan has a textured cooking surface to prevent food sticking and the special coating means that no harmful fumes are released in the foods at high temperatures. The Green Earth Pan by Ozeri is made of the highest quality anodized aluminium that allows for even cooking and browning without the risk of hot spots. It has a magnetised bottom for rapid heat transfer on induction stoves, and a heat resistant silicone coated handle, which means you are not going to burn you hand when you are cooking.

I really like this pan when cooking bacon on it or anything for that matter the textured surface not only stops the food from sticking, but also helped the food to create its own oil, even though the pan is very small in size its perfect for cooking up a quick breakfast, or pancakes and I absolutely love the colour this fabulous pan will not only add some brightness to a kitchen it also gives you the peace of mind that it is not emitting harmful fumes in the the air an all round great product.

The Ozeri pan is priced at £24.99 and is available to buy from Amazon  


I have been sent this lovely looking pan for the purpose of this review all opinions remain honest and my own.  


SHARE:

Sunday, 2 March 2014

Pancake day with Clarks Maple Syrup


I absolutely love pancake day, so when I was asked if I would like to try out some pancake recipes from Clarks Maple syrup I was delighted of course to agree.


I am going to give you the recipe they sent to me for inspiration and then show you the pancakes and recipe I used.

Dale Williams' American style pancakes made with maple syrup Ice-cream and cinnamon sugared fruits. (serves 4)


Ingredients;


  • 170g self-raising flour 
  • 1 tbsp Baking powder 
  • 100g Caster Sugar
  • 2 eggs separated
  • 275ml milk
  • 25g butter


For the ice-cream


  • 300ml whole milk 
  • 6 egg yolks 
  • 115g Caster Sugar 
  • 300ml double cream 
  • 3 tbsp Clarks pure Canadian Maple Syrup


easy delicious pancake day recipe


Method; for the Ice Cream 


Heat the milk in the pan until its scalding and remove from the heat.
whisk the egg yolks with sugar in a heat proof bowl until thick and creamy, slowly whisk in the warm milk.
Set the pan over a bowl of simmering water and stir with a wooden spoon until the mixture slightly thickens to coat the back of the spoon, Remove from the heat and stir in the maple syrup. Leave to cook completely then chill for one hour.
Whip the cream until soft peaks form, Fold the cream into the cold honey and custard.
Pour the mixture into an ice-cream machine and churn until set (This will make more than you need but freeze the mixture and it will keep several weeks)
Remove from the freezer 15 minutes before needed and leave at room temperature to soften slightly.

To make the Pancake batter  

Place the flour, baking powder and caster sugar into a clean mixing bowl and stir to combine
Add the eggs and milk whisk well to make a smooth batter. In a separate, clean, metallic bowl, whisk the egg whites until soft peaks form, then fold into the batter using a spatula.
Heat a heavy, non stick frying over a low-medium heat. Add the butter and heat until gently foaming using a small ladle, ladle the mixture into the frying pan in even measures to form small pancakes, fry for 2-3 minutes, then flip using a spatula ( The underside should be golden) remove from the pan and keep warm insulated in foil, and repeat with the remaining batter.

To Prepare the fruits


Place the strawberries, blueberries and bananas into a bowl, Mix the caster sugar together with the cinnamon and then scatter over the mixed fruits. Combine well with a spoon and set aside for 20-30 minutes until needed.

When ready to serve, stack the pancakes onto the centre of each plate, scatter the cinnamon fruits and finish with a scoop of maple syrup Ice Cream and lashings of maple syrup.

They look delicious don't they! well I didn't quite follow this recipe for the pancakes because Im not to fond of to much bread and unfortunately I don't own an icecream mecheine. This is how I made mine.


easy delicious pancake day recipe

For the pancake mixture

  • 110g/4oz plain flour, sifted
  • pinch of salt
  • 2 eggs
  • 200ml/7fl oz milk mixed with 75ml/3fl oz water
  • 50g/2oz butter


  1. Sift the flour and salt into a large mixing bowl with a sieve held high above the bowl so the flour gets an airing. Now make a well in the centre of the flour and break the eggs into it. Then begin whisking the eggs - you don't need an electrical whisk I just whisked my pancake mix with a fork

  2. Next gradually add small quantities of the milk and water mixture, continuing to whisk throughout. When all the liquid has been added, then whisk once more until the batter is smooth, then melt the 50g/2oz of butter in a pan. Spoon 2 tbsp of it into the batter and whisk it in, then pour the rest into a bowl and use it to lubricate the pan, using a wodge of kitchen paper to smear it round before you make each pancake.

  3. Now get the pan really hot, then turn the heat down to medium, spoon the batter into a ladle so it can be poured into the hot pan in one go. As soon as the batter hits the hot pan, tip it around from side to side to get the base evenly coated with batter. It should take only half a minute or so to cook of course depending on how thick you would like your pancakes you can lift the edge with a palette knife to see if it's tinged gold as it should be. Flip the pancake over to the other side, this will need probably only need a few seconds again of course depending in the thickness of the pancake - then simply slide it out of the pan onto a plate.
     
  4. Stack the pancakes as you make them, they do stay warm maybe use something to cover them so they stay warmer just that bit longer. 
Once ready top them or fill them with you favourite fillings, I of course used maple syrup and strawberries they were simply delicious, I also had one with caster sugar and orange, Its the fist time I have ever tried Clarks maple Syrup I found it really delicious its not to thick in texture and not to sweet I will definitely be enjoying Clarks Maple Syrup with pancakes again.

easy delicious pancake day recipe


I was sent Clarks Maple syrup and some recipe ideas for the purpose of this post all opinions remain honest and my own.
SHARE:

Saturday, 8 February 2014

Spaghetti Carbonara #Recipe


serves 4

400g dried plain spaghetti

fry light

100g back bacon

4 garlic cloves finely chopped

3 large eggs lightly beaten

120g Parmesan cheese

fresh parsley (optional)

Method

Cook the spaghetti according to the packet, meanwhile place a large frying pan sprayed with fry light over a medium heat, add the bacon and stir fry for 2-3 minutes or until lightly browned, Add the garlic and stir fry for 30 seconds, then set aside.

Drain the spaghetti and add the bacon mixture to the pan. Add half the Parmesan, and toss the heat from the spaghetti will partly cook the egg but still leave it moist

divide the Carbonara between four, add the fresh parsley if you wish, this meal is real easy it literally takes around 15 minutes to make and is very good if your on a budget!

spaghetti carbonara healthy family pasta meal

SHARE:

Monday, 3 February 2014

Simple Cottage pie #Recipe


Easy winter recipe simple cottage pie


Serves 4 

  • 1lb/445g extra lean minced beef
  • 2 onions finely chopped 
  • 4 carrots peeled and cut into bite sized chunks
  • 2tbsp Worcestershire sauce
  • 2 levels tbsp tomato puree
  • 426ml beef stock
  • salt and freshly ground pepper
  • 2lb/908g swede cut into bite sized chunks
  • 1lb/445g celeriac peeled and cut into bite sized chunks
  • A handful of fresh parsley finely chopped, plus extra to garnish


Method


Preheat your oven to 200'C/400F/Gas mark 6. prepare all the ingredients first, boil the Swede and celeriac for 12-15 minutes or until soft both vegetables are really hard to mash if there not soft.

Dry Fry the beef over a high heat for 3-4 minutes to brown it, stirring occasionally, add the carrots and cook for 5-6 minutes until they start to soften.

Add the Worcestershire sauce, tomato puree and stock then season, bring to the boil, then reduce heat to the medium - low and simmer for 25minutes stirring occasionally until the stock has reduced.

Drain the water from the swede and celeriac then return to the pan add the parsley season and then mash.

Spoon the beef mixture into the a deep ovenproof dish and pile on top the mash. Bake for 30 minutes.

Garnish the pie with the remaining chopped parsley and serve with extra vegetables.

This recipe is really simple but preparation is the key.  

SHARE:

Thursday, 23 January 2014

Minced Beef Hash

Serves 4

Ingredients

low calorie cooking spray
2 onions peeled and finely diced
2 garlic cloves peeled and crushed
1 tsp ground cumin
1 green chili, deseeded and finely diced
450g extra lean minced beef
1 Carrot, peeled and diced
400g can plum tomatoes
100ml beef stock
1 tsp dried oregano
4 tbsp finely chopped flat leafed parsley
salt and freshly ground black pepper


I left Out the oregano green chili and I added an extra beef stock the recipe was just as delicious without but this is the recipe as it is written.


  • Spray a large frying pan with low calorie cooking spray and place over a medium heat. Add the onions and stir-fry for 2-3 minutes.
  • Add the garlic, cumin and green chili, stirring  for a few moments to release the flavors. 
  • Add the minced beef and cook on high, stirring all the time and breaking up any lumps, until all the meat is sealed and browned.
  • Add the carrot, potatoes, tomatoes, stock and oregano and bring to the boil. Reduce heat to medium and simmer, covered for 12-15 minutes 
  • Remove from the heat, stir in the parsley and season to taste before serving.

This recipe is really simple and easy although I let my Minced beef hash simmer for a while longer so the potatoes and carrots are soft.


minced beef hash winter warmer recipe


SHARE:

Thursday, 16 January 2014

Chicken and Bacon Hotpot #Recipe


Approx ready in around 1hr 50 minutes 


Ingredients,

  • 2 chicken breasts 

  • Fry light

  • 1 medium onion chopped 

  • 4 bacon rashers 

  • 200g mushrooms quartered

  • 2 carrots cut into cubes

  • parsley leaves

  • 450ml chicken stock

  • 1tsp dried mixed herbs

  • salt and freshly ground pepper

  • 550g potatoes peeled and sliced thinly

  • 200g of steamed broccoli to serve (or your own choice of veg)


Method

preheat oven to 180C gas mark 4. place a frying pan over a medium heat. Spray the chicken with fry light and brown in the pan for five minutes turning half way through. Transfer to a large ovenproof casserole dish.


Place frying pan sprayed with fry light over a medium/high heat heat add the onion and the bacon and stir fry for 3-4 minutes until golden. stir in the mushrooms, carrots parsley, stock and half the mixed herbs, season and bring to the boil, stirring frequently.
healthy chicken and bacon hot pot recipe winter recipe
    
Pour the bacon mixture over the chicken. Arrange the potato slices on the top, overlapping then sprinkle over the remaining dried herbs season and spray with fry light. cover and bake the hot pot for 1 and a half hours
healthy chicken and bacon hot pot recipe winter recipe

Mean while pre-heat your grill to high remove the lid from your dish, spray the hotpot with a little more Fry Light and brown under the grill for 4-5 minutes. serve with broccoli or vegetables of your choice.
healthy chicken and bacon hot pot recipe winter recipe


SHARE:
Blogger Template Created by pipdig